Running an HA Teleport cluster using GCP, GKE, and Helm
In this guide, you will set up a High Availability Teleport cluster with multiple replicas in Kubernetes using Teleport Helm charts and Google Cloud Platform products (Firestore and Google Cloud Storage).
If you are already running Teleport on another platform, you can use your existing Teleport deployment to access your Kubernetes cluster. Follow our guide to connect your Kubernetes cluster to Teleport.
Teleport Enterprise Cloud takes care of this setup for you so you can provide secure access to your infrastructure right away.
Get started with a free trial of Teleport Enterprise Cloud.
How it works
The teleport-cluster Helm chart deploys the Teleport Auth Service and Teleport
Proxy Service on your Google Kubernetes Engine cluster. The chart requires the
following resources, which we show you how to create in this guide:
- IAM permissions for the Teleport Auth Service. The Auth Service requires permissions to manage resources on its backend.
- cert-manager for obtaining and renewing TLS credentials that the Proxy Service uses to run its HTTPS server.
- IAM permissions for cert-manager. In the setup we show in this guide,
cert-managermodifies DNS records to demonstrate domain ownership and receive TLS credentials from Let's Encrypt. To do so, the Proxy Service completes the ACME DNS-01 challenge. - Teleport Auth Service backend components: A Google Cloud Storage bucket and Firestore database.
Prerequisites
- Kubernetes >= v1.17.0
- Helm >= v3.4.2
Teleport's charts require the use of Helm version 3. You can install Helm 3 by following these instructions.
Throughout this guide, we will assume that you have the helm and kubectl binaries available in your PATH:
helm versionversion.BuildInfo{Version:"v3.4.2"}
kubectl versionClient Version: version.Info{Major:"1", Minor:"17+"}
Server Version: version.Info{Major:"1", Minor:"17+"}
Best practices for production security
When running Teleport in production, you should adhere to the following best practices to avoid security incidents:
- Avoid using
sudoin production environments unless it's necessary. - Create new, non-root, users and use test instances for experimenting with Teleport.
- Run Teleport's services as a non-root user unless required. Only the SSH
Service requires root access. Note that you will need root permissions (or
the
CAP_NET_BIND_SERVICEcapability) to make Teleport listen on a port numbered <1024(e.g.443). - Follow the principle of least privilege. Don't give users
permissive roles when more a restrictive role will do.
For example, don't assign users the built-in
access,editorroles, which give them permissions to access and edit all cluster resources. Instead, define roles with the minimum required permissions for each user and configure Access Requests to provide temporary elevated permissions. - When you enroll Teleport resources—for example, new databases or applications—you
should save the invitation token to a file.
If you enter the token directly on the command line, a malicious user could view
it by running the
historycommand on a compromised system.
You should note that these practices aren't necessarily reflected in the examples used in documentation. Examples in the documentation are primarily intended for demonstration and for development environments.
Step 1/6. Add the Teleport Helm chart repository
Configure Helm to fetch Teleport charts from the Teleport Helm repository:
helm repo add teleport https://charts.releases.teleport.dev
Refresh the local Helm cache by fetching the latest charts:
helm repo update
The steps below apply to Google Cloud Google Kubernetes Engine (GKE) Standard deployments.
Step 2/6. Google Cloud IAM configuration
For Teleport to be able to create the Firestore collections, indexes, and the Google Cloud Storage bucket it needs, you'll need to configure a Google Cloud service account with permissions to use these services.
Create an IAM role granting the storage.buckets.create permission
- gcloud CLI
- Console
Run on your workstation:
gcloud iam roles create storage_bucket_creator_role \ --project=$(gcloud config get-value project) \ --title="Storage Bucket Creator" \ --description="Allows creation of storage buckets" \ --permissions=storage.buckets.create \ --stage=GA
Go to the "Roles" section of Google Cloud IAM & Admin.
-
Click the "Create Role" button at the top.
-
Fill in the details of a "Storage Bucket Creator" role (we suggest using the name
storage-bucket-creator-role) -
Click the "Add Permissions" button.
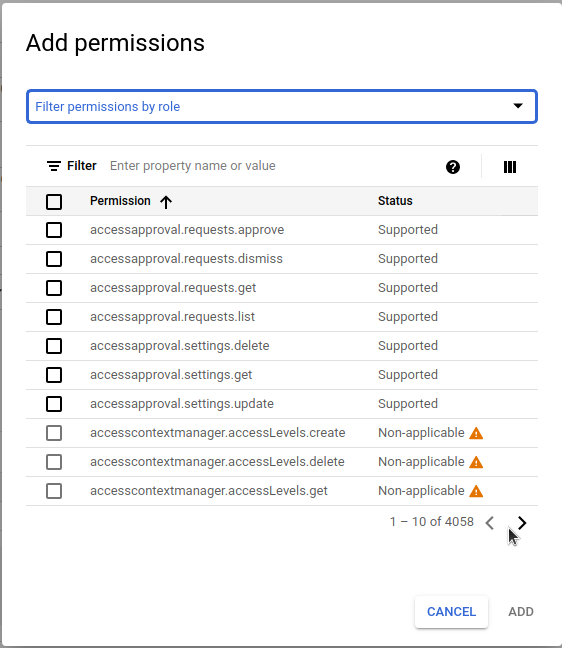
-
Use the "Filter" box to enter
storage.buckets.createand select it in the list.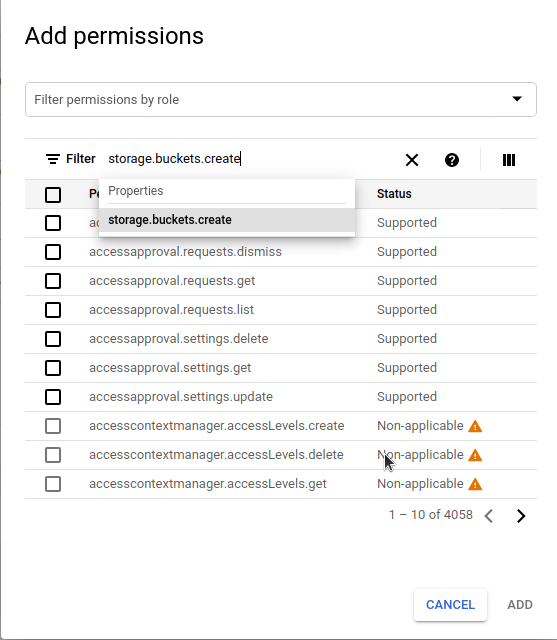
-
Check the
storage.buckets.createpermission in the list and click the "Add" button to add it to the role.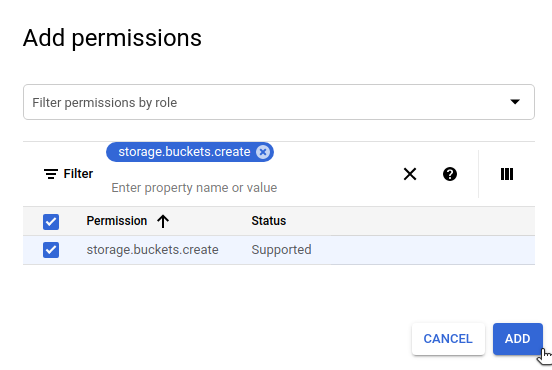
-
Once all these settings are entered successfully, click the "Create" button.
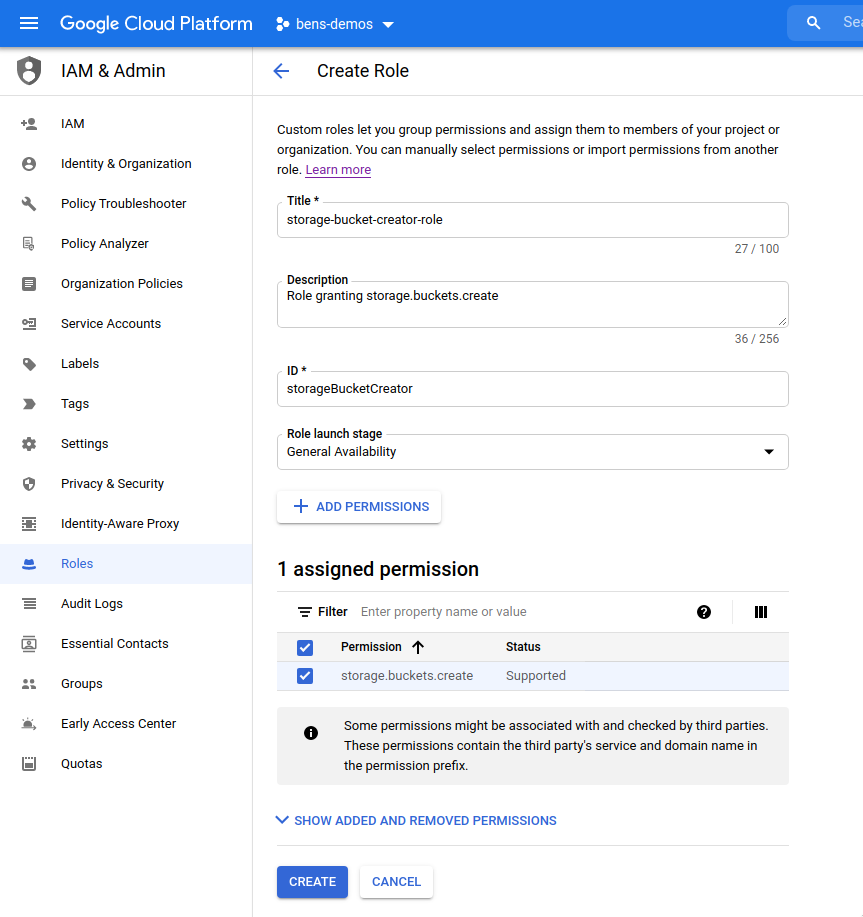
Create an IAM role granting Cloud DNS permissions
- gcloud CLI
- Console
Run on your workstation:
gcloud iam roles create dns_updater_role \ --project=$(gcloud config get-value project) \ --title="DNS Updater" \ --description="Allows updates to Cloud DNS records" \ --permissions=dns.resourceRecordSets.create,dns.resourceRecordSets.delete,dns.resourceRecordSets.list,dns.resourceRecordSets.update,dns.changes.create,dns.changes.get,dns.changes.list,dns.managedZones.list \ --stage=GA
Go to the "Roles" section of Google Cloud IAM & Admin.
-
Click the "Create Role" button at the top.
-
Fill in the details of a "DNS Updater" role (we suggest using the name
dns-updater-role)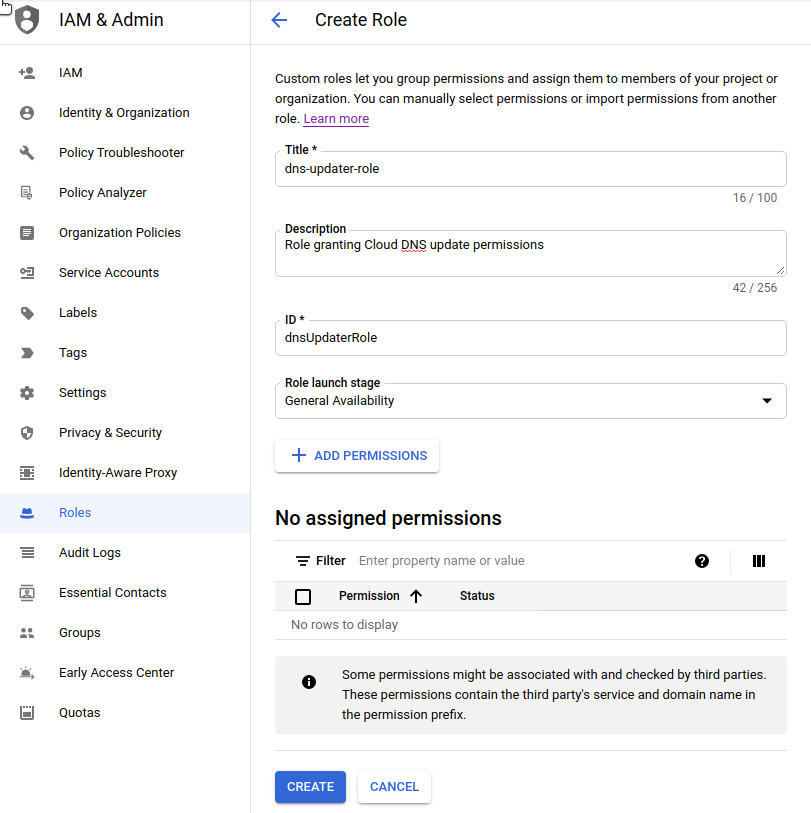
-
Click the "Add Permissions" button.
-
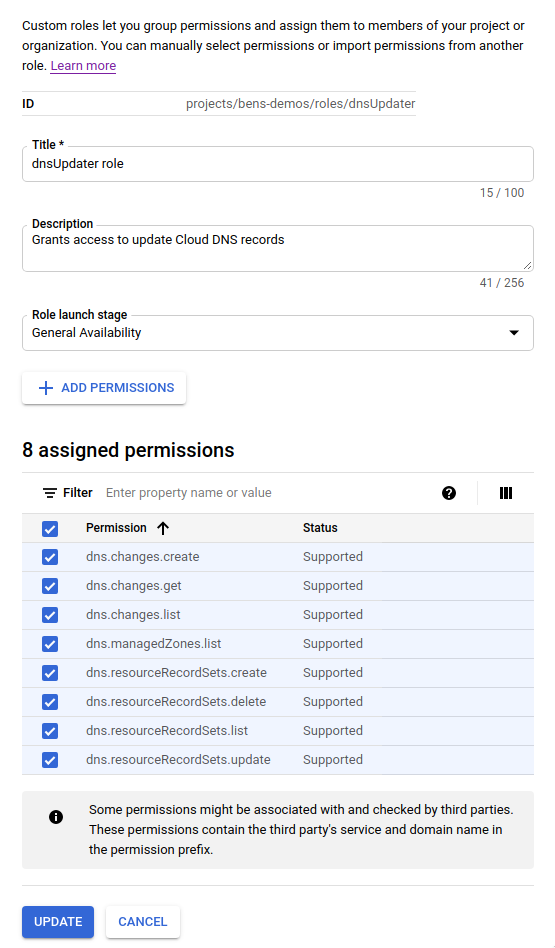
Use the "Filter" box to find each of the following permissions in the list and add it. You can type things like
dns.resourceRecordSets.*to quickly filter the list.dns.resourceRecordSets.create dns.resourceRecordSets.delete dns.resourceRecordSets.list dns.resourceRecordSets.update dns.changes.create dns.changes.get dns.changes.list dns.managedZones.list -
Once all these settings are entered successfully, click the "Create" button.
Create a service account for the Teleport Helm chart
If you already have a JSON private key for an appropriately-provisioned service account that you wish to use, you can skip this creation process and go to the "Create the Kubernetes secret containing the JSON private key for the service account" section below.
- gcloud CLI
- Console
Run on your workstation:
export GCP_PROJECT=$(gcloud config get-value project)Create the service account
gcloud iam service-accounts create teleport-helm \ --description="Service account for Teleport Helm chart" \ --display-name="Teleport Helm"export SA_EMAIL=teleport-helm@${GCP_PROJECT}.iam.gserviceaccount.comBind the required roles to the service account
gcloud projects add-iam-policy-binding $GCP_PROJECT \ --member="serviceAccount:${SA_EMAIL}" \ --role="projects/${GCP_PROJECT}/roles/storage_bucket_creator_role"gcloud projects add-iam-policy-binding $GCP_PROJECT \ --member="serviceAccount:${SA_EMAIL}" \ --role="projects/${GCP_PROJECT}/roles/dns_updater_role"gcloud projects add-iam-policy-binding $GCP_PROJECT \ --member="serviceAccount:${SA_EMAIL}" \ --role="roles/datastore.owner"gcloud projects add-iam-policy-binding $GCP_PROJECT \ --member="serviceAccount:${SA_EMAIL}" \ --role="roles/storage.objectAdmin"
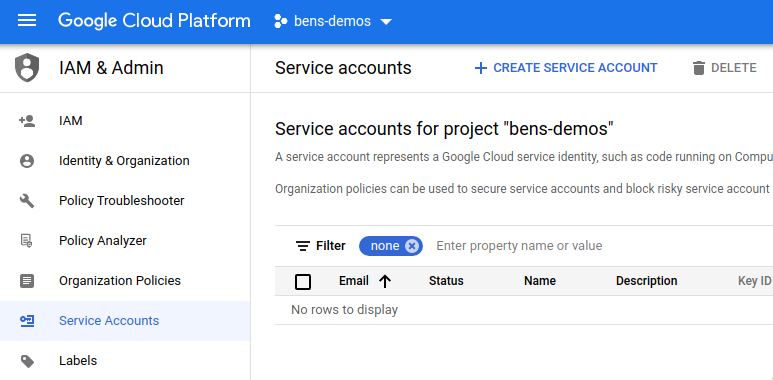
Go to the "Service Accounts" section of Google Cloud IAM & Admin.
-
Click the "Create Service Account" button at the top.
-
Enter details for the service account (we recommend using the name
teleport-helm) and click the "Create" button.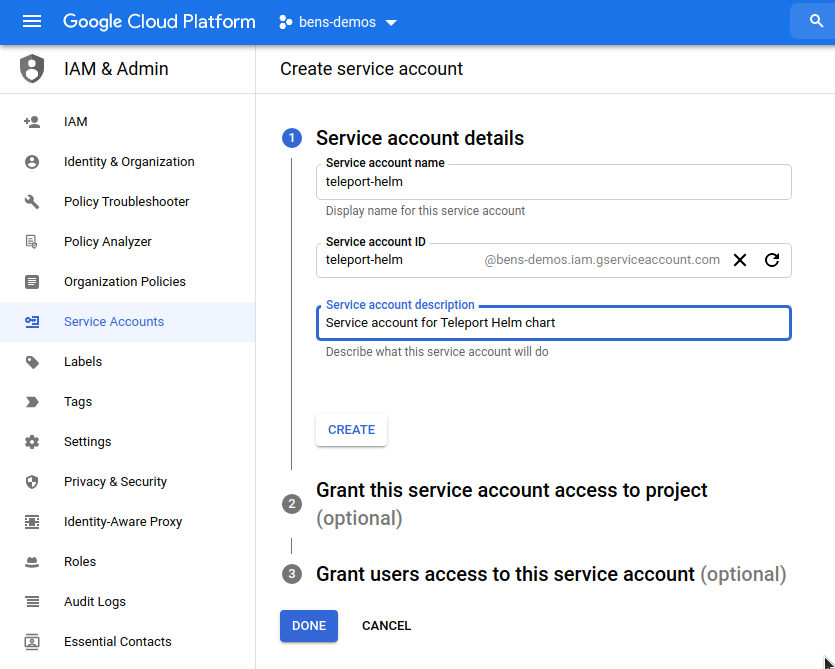
-
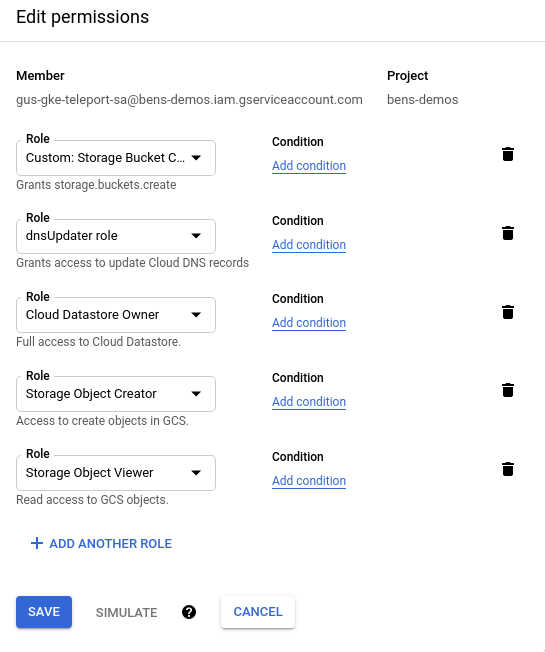
In the "Grant this service account access to project" section, add these four roles:
| Role | Purpose |
|---|---|
| storage-bucket-creator-role | Role you just created allowing creation of storage buckets |
| dns-updater-role | Role you just created allowing updates to Cloud DNS records |
| Cloud Datastore Owner | Grants permissions to create Cloud Datastore collections |
| Storage Object Admin | Allows read/write/delete of Google Cloud storage objects |
- Click the "continue" button to save these settings, then click the "create" button to create the service account.
Generate an access key for the service account
- gcloud CLI
- Console
Run on your workstation:
export GCP_PROJECT=$(gcloud config get-value project)export SA_EMAIL=teleport-helm@${GCP_PROJECT}.iam.gserviceaccount.comgcloud iam service-accounts keys create teleport-gcp-credentials.json \ --iam-account=$SA_EMAIL
The JSON private key will be saved to teleport-gcp-credentials.json in your current directory.
Go back to the "Service Accounts" view in Google Cloud IAM & Admin.
-
Click on the
teleport-helmservice account that you just created.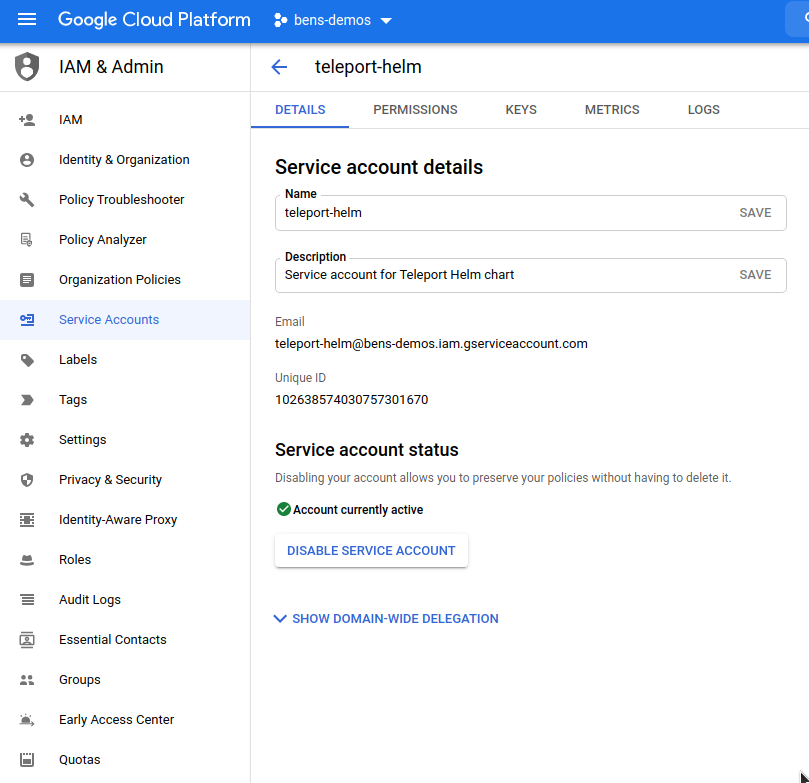
-
Click the "Keys" tab at the top and click "Add Key". Choose "JSON" and click "Create".
-
The JSON private key will be downloaded to your computer. Take note of the filename (
bens-demos-24150b1a0a7f.jsonin this example) as you will need it shortly.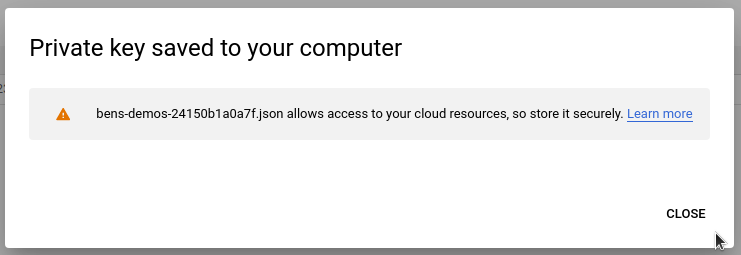
Create the Kubernetes secret containing the JSON private key for the service account
Find the path where the JSON private key was just saved (likely your browser's default "Downloads" directory).
Use kubectl to create the teleport namespace, set its security policy, and
create the secret using the path to the JSON private key:
kubectl create namespace teleportnamespace/teleport createdkubectl label namespace teleport 'pod-security.kubernetes.io/enforce=baseline'namespace/teleport labeledkubectl --namespace teleport create secret generic teleport-gcp-credentials --from-file=gcp-credentials.json=/path/to/downloads/bens-demos-24150b1a0a7f.jsonsecret/teleport-gcp-credentials created
If you installed the Teleport chart into a specific namespace, the teleport-gcp-credentials secret you create must also be added to the same namespace.
The default name configured for the secret is teleport-gcp-credentials.
If you already have a secret created, you can skip this creation process and specify the name of the secret using gcp.credentialSecretName.
The credentials file stored in any secret used must have the key name gcp-credentials.json.
Checkpoint:
Verify the Kubernetes secret was created:
kubectl --namespace teleport get secret teleport-gcp-credentials -o jsonpath='{.metadata.name}'
You should see teleport-gcp-credentials in the output.
You can reach out to our Slack community or customer support for help.
Step 3/6. Install and configure cert-manager
Reference the cert-manager docs.
In this example, we are using multiple pods to create a High Availability Teleport cluster. As such, we will be using
cert-manager to centrally provision TLS certificates using Let's Encrypt. These certificates will be mounted into each
Teleport pod, and automatically renewed and kept up to date by cert-manager.
If you do not have cert-manager already configured in the Kubernetes cluster where you are installing Teleport,
you should add the Jetstack Helm chart repository which hosts the cert-manager chart, and install the chart:
helm repo add jetstack https://charts.jetstack.iohelm repo updatehelm install cert-manager jetstack/cert-manager \--create-namespace \--namespace cert-manager \--set global.leaderElection.namespace=cert-manager \--set installCRDs=true
Checkpoint:
Verify cert-manager is running:
kubectl --namespace cert-manager get pods
All cert-manager pods should show Running status with 1/1 ready.
You can reach out to our Slack community or customer support for help.
Once cert-manager is installed, you should create and add an Issuer.
You'll need to replace these values in the Issuer example below:
| Placeholder value | Replace with |
|---|---|
email@address.com | An email address to receive communications from Let's Encrypt |
example.com | The name of the Cloud DNS domain hosting your Teleport cluster |
gcp-project-id | GCP project ID where the Cloud DNS domain is registered |
cat << EOF > gcp-issuer.yaml
apiVersion: cert-manager.io/v1
kind: Issuer
metadata:
  name: letsencrypt-production
  namespace: teleport
spec:
  acme:
    email: email@address.com                                # Change this
    server: https://acme-v02.api.letsencrypt.org/directory
    privateKeySecretRef:
      name: letsencrypt-production
    solvers:
    - selector:
        dnsZones:
          - "example.com"                                  # Change this
      dns01:
        cloudDNS:
          project: gcp-project-id                          # Change this
          serviceAccountSecretRef:
            name: teleport-gcp-credentials
            key: gcp-credentials.json
EOF
The secret name under serviceAccountSecretRef here defaults to teleport-gcp-credentials.
If you have changed gcp.credentialSecretName in your chart values, you must also make sure it matches here.
After you have created the Issuer and updated the values, add it to your cluster using kubectl:
kubectl --namespace teleport create -f gcp-issuer.yaml
Step 4/6. Set values to configure the cluster
License Secret
Before you can install Teleport Enterprise in your Kubernetes cluster, you will need to create a secret that contains your Teleport license information.
The Teleport Auth Service reads a license file to authenticate your Teleport Enterprise account.
To obtain your license file, navigate to your Teleport account dashboard and log in. You can start at teleport.sh and enter your Teleport account name (e.g. my-company). After logging in you will see a "GENERATE LICENSE KEY" button, which will generate a new license file and allow you to download it.
Create a secret from your license file. Teleport will automatically discover
this secret as long as your file is named license.pem.
kubectl -n teleport create secret generic license --from-file=license.pem
If you are installing Teleport in a brand new GCP project, make sure you have enabled the Cloud Firestore API and created a Firestore Database in your project before continuing.
You can enable the API and create the database from the CLI:
gcloud services enable firestore.googleapis.com --project=$(gcloud config get-value project)gcloud firestore databases create --location=us-central1 --type=firestore-native --project=$(gcloud config get-value project)
Next, configure the teleport-cluster Helm chart to use the gcp mode. Create a
file called gcp-values.yaml file and write the values you've chosen above to
it:
- Teleport Community Edition
- Teleport Enterprise
chartMode: gcp
clusterName: teleport.example.com                 # Name of your cluster. Use the FQDN you intend to configure in DNS below
gcp:
  projectId: gcpproj-123456                       # Google Cloud project ID
  backendTable: teleport-helm-backend             # Firestore collection to use for the Teleport backend
  auditLogTable: teleport-helm-events             # Firestore collection to use for the Teleport audit log (must be different to the backend collection)
  auditLogMirrorOnStdout: false                   # Whether to mirror audit log entries to stdout in JSON format (useful for external log collectors)
  sessionRecordingBucket: teleport-helm-sessions  # Google Cloud Storage bucket to use for Teleport session recordings
highAvailability:
  replicaCount: 2                                 # Number of replicas to configure
  certManager:
    enabled: true                                 # Enable cert-manager support to get TLS certificates
    issuerName: letsencrypt-production            # Name of the cert-manager Issuer to use (as configured above)

# If you are running Kubernetes 1.23 or above, disable PodSecurityPolicies
podSecurityPolicy:
  enabled: false
chartMode: gcp
clusterName: teleport.example.com                 # Name of your cluster. Use the FQDN you intend to configure in DNS below
gcp:
  projectId: gcpproj-123456                       # Google Cloud project ID
  backendTable: teleport-helm-backend             # Firestore collection to use for the Teleport backend
  auditLogTable: teleport-helm-events             # Firestore collection to use for the Teleport audit log (must be different to the backend collection)
  auditLogMirrorOnStdout: false                   # Whether to mirror audit log entries to stdout in JSON format (useful for external log collectors)
  sessionRecordingBucket: teleport-helm-sessions  # Google Cloud Storage bucket to use for Teleport session recordings
highAvailability:
  replicaCount: 2                                 # Number of replicas to configure
  certManager:
    enabled: true                                 # Enable cert-manager support to get TLS certificates
    issuerName: letsencrypt-production            # Name of the cert-manager Issuer to use (as configured above)
enterprise: true                                  # Indicate that this is a Teleport Enterprise deployment
Install the chart with the values from your gcp-values.yaml file using this command:
helm install teleport teleport/teleport-cluster \ --create-namespace \ --namespace teleport \ -f gcp-values.yaml
You cannot change the clusterName after the cluster is configured, so make sure you choose wisely. We recommend using the fully-qualified domain name that you'll use for external access to your Teleport cluster.
Checkpoint:
Verify the Helm installation succeeded and pods are running:
kubectl --namespace teleport get pods
You should see auth and proxy pods in Running state. If pods are in CrashLoopBackOff or Error state, check logs:
kubectl --namespace teleport logs deploy/teleport-auth --tail=50
You can reach out to our Slack community or customer support for help.
Once the chart is installed, you can use kubectl commands to view the deployment:
kubectl --namespace teleport get all
NAME                                 READY   STATUS    RESTARTS   AGEpod/teleport-auth-57989d4cbd-4q2ds   1/1     Running   0          22hpod/teleport-auth-57989d4cbd-rtrzn   1/1     Running   0          22hpod/teleport-proxy-c6bf55cfc-w96d2   1/1     Running   0          22hpod/teleport-proxy-c6bf55cfc-z256w   1/1     Running   0          22h
NAME                        TYPE           CLUSTER-IP     EXTERNAL-IP     PORT(S)                                                                     AGEservice/teleport            LoadBalancer   10.40.11.180   34.138.177.11   443:30258/TCP,3023:31802/TCP,3026:32182/TCP,3024:30101/TCP,3036:30302/TCP   22hservice/teleport-auth       ClusterIP      10.40.8.251    <none>          3025/TCP,3026/TCP                                                           22hservice/teleport-auth-v11   ClusterIP      None           <none>          <none>                                                                      22hservice/teleport-auth-v12   ClusterIP      None           <none>          <none>                                                                      22h
NAME                             READY   UP-TO-DATE   AVAILABLE   AGEdeployment.apps/teleport-auth    2/2     2            2           22hdeployment.apps/teleport-proxy   2/2     2            2           22h
NAME                                       DESIRED   CURRENT   READY   AGEreplicaset.apps/teleport-auth-57989d4cbd   2         2         2       22hreplicaset.apps/teleport-proxy-c6bf55cfc   2         2         2       22h
Step 5/6. Set up DNS
You'll need to set up a DNS A record for teleport.example.com.
Enrolling applications with Teleport?
Once the Teleport Application Service is proxying traffic to your web application, the Teleport Proxy Service makes the application available at the following URL:
https://<APPLICATION_NAME>.<TELEPORT_DOMAIN>
For example, if your Teleport domain name is teleport.example.com, the
application named my-app would be available at
https://my-app.teleport.example.com. The Proxy Service must present a TLS
certificate for this domain name that browsers can verify against a certificate
authority.
If you are using Teleport Enterprise (Cloud), DNS records and TLS certificates for this domain name are provisioned automatically. If you are self-hosting Teleport, you must configure these yourself:
-
Create either:
- A DNS A record that associates a wildcard subdomain of your Teleport Proxy
Service domain, e.g.,
*.teleport.example.com, with the IP address of the Teleport Proxy Service. - A DNS CNAME record that associates a wildcard subdomain of your Proxy
Service domain, e.g.,
*.teleport.example.com, with the domain name of the Teleport Proxy Service.
- A DNS A record that associates a wildcard subdomain of your Teleport Proxy
Service domain, e.g.,
-
Ensure that your system provisions TLS certificates for Teleport-registered applications. The method to use depends on how you originally set up TLS for your self-hosted Teleport deployment, and is outside the scope of this guide.
In general, the same system that provisions TLS certificates signed for the web address of the Proxy Service (e.g.,
teleport.example.com) must also provision certificates for the wildcard address used for applications (e.g.,*.teleport.example.com).
Take care not to create DNS records that map the Teleport cluster subdomain of a registered application to the application's own host, as attempts to navigate to the application will fail.
Here's how to do this using Google Cloud DNS:
- gcloud CLI (transaction)
- gcloud CLI (direct)
Change these parameters if you altered them above
NAMESPACE=teleportRELEASE_NAME=teleportMYIP=$(kubectl --namespace ${NAMESPACE?} get service/${RELEASE_NAME?} -o jsonpath='{.status.loadBalancer.ingress[*].ip}')MYZONE="myzone"MYDNS="teleport.example.com"gcloud dns record-sets transaction start --zone="${MYZONE?}"gcloud dns record-sets transaction add ${MYIP?} --name="${MYDNS?}" --ttl="300" --type="A" --zone="${MYZONE?}"gcloud dns record-sets transaction add ${MYIP?} --name="*.${MYDNS?}" --ttl="300" --type="A" --zone="${MYZONE?}"gcloud dns record-sets transaction describe --zone="${MYZONE?}"gcloud dns record-sets transaction execute --zone="${MYZONE?}"
Change these parameters if you altered them above
NAMESPACE=teleportRELEASE_NAME=teleportMYIP=$(kubectl --namespace ${NAMESPACE?} get service/${RELEASE_NAME?} -o jsonpath='{.status.loadBalancer.ingress[*].ip}')MYZONE="myzone"MYDNS="teleport.example.com"Create the A record for the cluster domain
gcloud dns record-sets create "${MYDNS}." \ --zone="${MYZONE}" \ --type="A" \ --ttl="300" \ --rrdatas="${MYIP}"Create the wildcard A record for application access
gcloud dns record-sets create "*.${MYDNS}." \ --zone="${MYZONE}" \ --type="A" \ --ttl="300" \ --rrdatas="${MYIP}"
Checkpoint:
Verify DNS records were created and resolve correctly:
gcloud dns record-sets list --zone="${MYZONE}" --filter="name=${MYDNS}."
You should see an A record pointing to your load balancer IP. You can also verify DNS resolution:
dig +short ${MYDNS}
This should return the external IP of your load balancer.
You can reach out to our Slack community or customer support for help.
Step 6/6. Create a Teleport user
Create a user to be able to log into Teleport. This needs to be done on the Teleport Auth Service,
so we can run the command using kubectl:
- Teleport Community Edition
- Commercial
kubectl --namespace teleport exec deploy/teleport-auth -- tctl users add test --roles=access,editor
User "test" has been created but requires a password. Share this URL with the user to complete user setup, link is valid for 1h:https://teleport.example.com:443/web/invite/91cfbd08bc89122275006e48b516cc68
NOTE: Make sure teleport.example.com:443 points at a Teleport proxy that users can access.
kubectl --namespace teleport exec deploy/teleport-auth -- tctl users add test --roles=access,editor,reviewer
User "test" has been created but requires a password. Share this URL with the user to complete user setup, link is valid for 1h:https://teleport.example.com:443/web/invite/91cfbd08bc89122275006e48b516cc68
NOTE: Make sure teleport.example.com:443 points at a Teleport proxy that users can access.
Load the user creation link to create a password and set up multi-factor authentication for the Teleport user via the web UI.
Checkpoint:
Verify the cluster is fully operational:
kubectl --namespace teleport exec deploy/teleport-auth -- tctl status
You should see the cluster name, version, and CA pin displayed without errors.
You can reach out to our Slack community or customer support for help.
High Availability
In this guide, we have configured 2 replicas. This can be changed after cluster creation by altering the highAvailability.replicaCount
value using helm upgrade as detailed below.
Upgrading the cluster after deployment
To make changes to your Teleport cluster after deployment, you can use helm upgrade.
Helm defaults to using the latest version of the chart available in the repo, which will also correspond to the latest
version of Teleport. You can make sure that the repo is up to date by running helm repo update.
If you want to use a different version of Teleport, set the teleportVersionOverride value.
Here's an example where we set the chart to use 3 replicas:
- Using values.yaml
- Using --set via CLI
Edit your gcp-values.yaml file from above and make the appropriate changes.
Upgrade the deployment with the values from your gcp-values.yaml file using this command:
helm upgrade teleport teleport/teleport-cluster \ --namespace teleport \ -f gcp-values.yaml
Run this command, editing your command line parameters as appropriate:
helm upgrade teleport teleport/teleport-cluster \ --namespace teleport \ --set highAvailability.replicaCount=3
To change chartMode, clusterName or any gcp settings, you must first uninstall the existing chart and then install
a new version with the appropriate values.
Uninstalling Teleport
To uninstall the teleport-cluster chart, use helm uninstall <release-name>. For example:
helm --namespace teleport uninstall teleport
Uninstalling cert-manager
If you want to remove the cert-manager installation later, you can use this command:
helm --namespace cert-manager uninstall cert-manager
Next steps
Now that you have deployed a Teleport cluster, read the Manage Access section to get started enrolling users and setting up RBAC.
See the high availability section of our Helm chart reference for more details on high availability.